|
This next recipe is an early Christmas gift to my mom! Merry Christmas!! Whenever I think of orange rolls, I think of her and our Christmas mornings as kids. I know she LOVES them just as much as we did. It just wouldn't be the same without some this year! I've been determined to create a yummy gluten free version so we both don't feel like we're missing out. Hope you all enjoy them too! Gluten Free Orange Rolls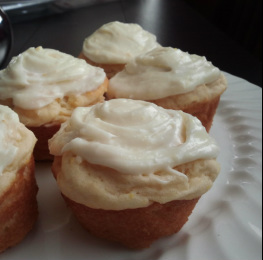 (Gluten Free, Can be Dairy Free) Created by jalene Makes 12 Orange Roll Ingredients:
Orange Roll Directions:
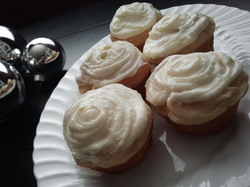 Orange Frosting: Blend together 1 tsp orange zest, 1 Tbsp orange juice, 1 & 1/4 cup powdered sugar, 1 & 1/2 oz of cream cheese (or vegan sub to make it dairy free), and 2 Tbsp of butter (or Earth Balance to make it dairy free). Makes about 2 Tbsp per orange roll.
0 Comments
I have a NEW holiday favorite!!! Seriously, does anyone know why it is called "Pound Cake" though? After creating this recipe I can take a guess... because I LITERALLY wanted to pound this cake down! We actually ate so much that I had to made another batch to take pictures! Ha ha. It's that good. My husband was surprised how moist it was and tasted like the gluten version. You could definitely serve this to people and they WOULD NOT know it's gluten free! I love that it's made with almond and coconut flour so it's not only gluten free but grain free as well! Almond flour is packed with great protein (among other benefits) and the coconut flour provides great fiber and is low carb. And don't even get me started on the cranberries! After you read about the benefits you'll wonder why you don't eat them everyday! In fact, cranberries are super cheap this time of year (after Thanksgiving) so you can save $ by stocking up and freezing some now. Well, I think you're going to LOVE it! ;) So, without further ado... Almond Cranberry Paleo Pound Cake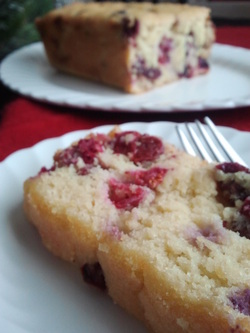 Please don't lick the computer screen... Please don't lick the computer screen... (Gluten Free, Dairy Free, Grain Free, Paleo, Can be Corn Free) Adapted by jalene from a recipe by askgeorgie.com Makes about 8-10 (1-inch thick) slices Ingredients:
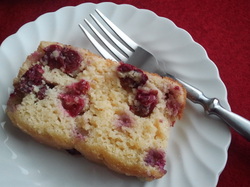 So good you won't know it's gluten free! So good you won't know it's gluten free! Directions:
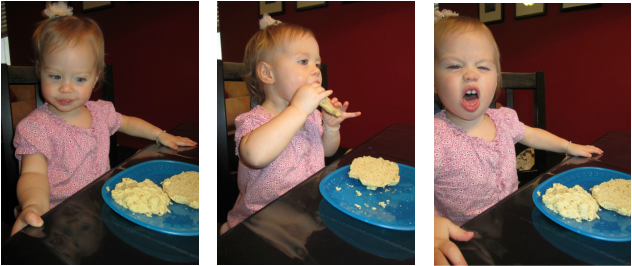
Recipe Update: We've posted a new VIDEO on how to make these Gluten-Free Biscuits featuring me (jalene) and my husband Dr. Nielsen. Be sure to check it out for tips and helpful hints. (Link at bottom of recipe or you can also view it on our NEW PAGE: "How To Videos") Can I just start out by saying this next recipe has taken me so long to make! I have tried SO MANY gluten free, dairy free biscuits. And then it happened. I PERFECTED it! It had a great crust, it's shape-able yet moist, it holds together well, has a good flavor, and can also be used as sandwich rolls! My husband loves them so much he requested them for Father's day AND his birthday. So, excited to share this recipe with you, I headed to the computer to type it out...and crazy luck but somewhere in between the kitchen and the computer room, I LOST my recipe! Can you believe it?! I keep my experimental recipes on little post-it notes (which is a BAD idea and I'll soon change that after this experience). But ugh, after all that work. So then I tried for an entire week to remember and recreate it. (And Audrey has let me know if they were good ones or not... Here's some pictures from some of my first biscuits...ha ha) Poor girl. Anyways, after all that drama, I FOUND the post-it note! So with out further ado (because there has already been enough of that...) here is my gluten free, dairy free baking powder biscuits! 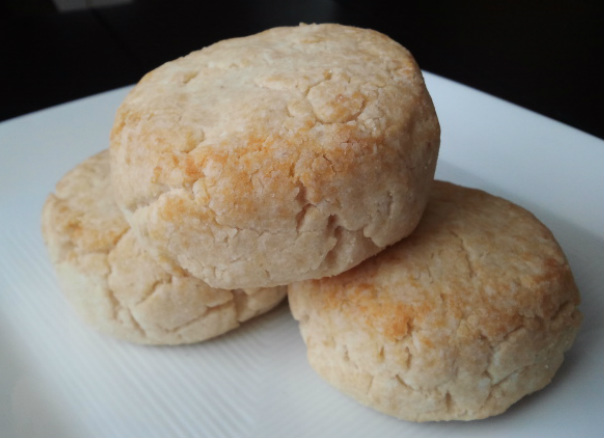 Baking Powder Biscuits (Gluten Free, Dairy Free, Vegan) Created by jalene Ingredients:
Directions:
 These biscuits work amazing as sandwich rolls. They hold together good (even better than most gluten free bread).
After teaching one of our Gluten Free classes, a cute couple came up to me and asked if I had a Yorkshire Pudding recipe. Unfortunately, I had never even heard of it! It sounded like a yummy dessert but apparently it's a bread named after the town (Yorkshire) in England. It came about as an inventive way to use up the drippings from meat. There are MANY different variations- some using drippings, others just using butter. So here's my version of Yorkshire Pudding. Regardless if it's identical to the gluten infested version or not, it tastes super yummy and makes a fast & tasty roll that goes great with soup! Enjoy! Gluten Free Yorkshire Pudding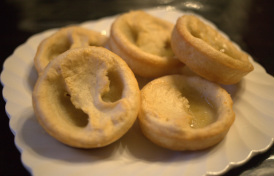 Gluten Free Yorkshire Pudding (Gluten Free, Can be Dairy Free) Created by jalene Ingredients:
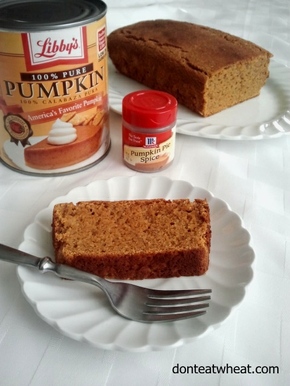
Want a yummy soup to go with these?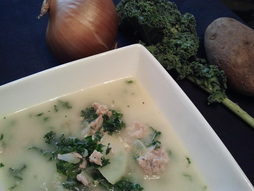 Gluten Free, Dairy Free Zuppa Toscana Soup Try any of my great gluten free soup recipes! Click the link below to view all of them. Gluten Free SOUPS My favorite: Zuppa Toscana Soup You know me, I'm always trying to find an easy way to do gluten free without mixing all these different flours. I think I stumbled upon a good combination for this next bread. 3/4 parts Brown Rice Flour and 1/4 part Quinoa Flour. Interesting combination but it totally works! The Quinoa adds a great fluffy and moist texture as well as nutrient power! The brown rice and coconut oil also bring great benefits to the bread. Overall, it might be one of the healthier gluten free pumpkin breads you'll try without messing with the traditional taste of one. I think you're going to love it! My family sure does. In fact, the other night I asked my husband if he wanted me to make some more milk so he could have some cereal. He replied yes and said, "Could you make more bread?" Then my sweet 2 year old pipped in and said, "An punkin bread!" What a cutie. She figured if we were making requests she'd like to put her 2 bits in! Let me know what YOUR family thinks! Enjoy. Gluten Free Pumpkin Bread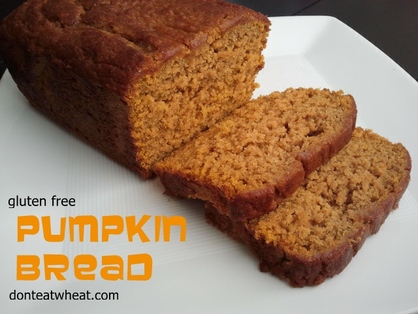 (Gluten Free, Can be Dairy Free) Adapted by jalene from a Better Homes and Garden Recipe Ingredients:
Directions:
Believe it or not, Monkey Bread was one of the first desserts I learned how to make when I was younger. I was in junior high home ec class and let me tell ya, any child's interest peaks when there's sugar involved! The version she taught us is far from this one however. She used prepackaged biscuits and gluten-infested ingredients. Her recipe worked great for an early learner but I have since adapted it so we can still enjoy it today! The greatest compliment I think I've had is my own father-in-law who wont even touch desserts, ate 2 of these the other night. ;) (It helped that I made them gluten free and dairy free for him.) Gluten Free Monkey Bread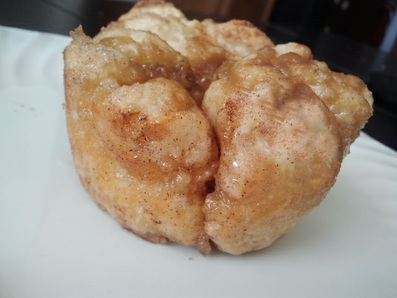 (Gluten Free, Can be Dairy Free) Created by jalene Makes about 24 individual muffin desserts Dough Ingredients:
Cinnamon Sugar Combo:
 Directions:
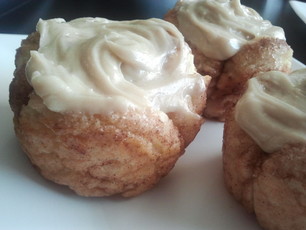
Oh was that mean of me or what to make you wait almost a week for this recipe?! These babies are so AMAZING. I have been trying to not make them every day but as soon as I make a batch they seem to disappear. Not only do they taste amazing but they're super cute too! I've seen some gluten free cinnamon rolls that don't even look appetizing! The bonus on these ones...they're pull-aparts! You don't even have to mess with rolling them out! (Which lets be frank, gluten free dough does not have the same consistency to be rolled out. It's just too sticky.) (Before we begin I must say: though you don't have to have one for this recipe, a 1 inch cookie scoop comes super in handy.) Gluten Free Cinnamon Rolls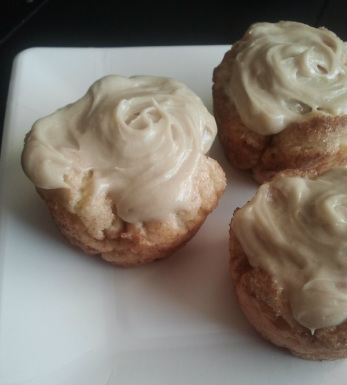 (Gluten Free, Dairy Free) Created by jalene Makes 12 cinnamon rolls Roll Ingredients:
 You will also need:
Directions:
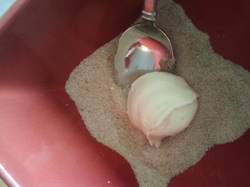 3. Using a 1 inch cookie scooper, scoop a mound into your cinnamon and sugar. Coat the dough and place into muffin tin. Repeat two more times so you should have a total of three cinnamon & sugar coated mounds in 1 tin. Repeat until the entire dough is used. 4. Pour 1/2 tsp of the melted butter over the top of each muffin section. (This gives an excellent taste and helps prevent sticking.) 5. Spray a sheet of plastic wrap with olive oil and place on top of the rolls. Let rise about 15 minutes. Preheat your oven to 375 F. 6. Bake for about 15 minutes or until light brown. Meanwhile make your frosting. (These are really good without frosting too though!) 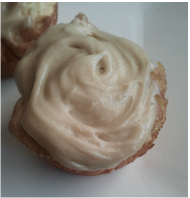 Frosting Ingredients:
Frosting Directions:
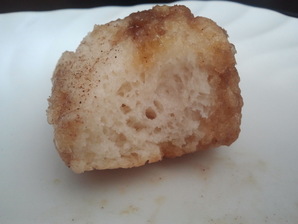
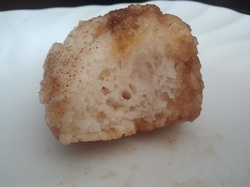 Inside shot! Can you believe the air pockets? These cinnamon rolls are so light and fluffy. Try them & let me know what you think! Recipe UPDATE: I have another roll recipe that I've been using more for Hamburger Buns. They're quick and they look beautiful. This is still a great recipe, I just prefer my Quick Roll Recipe instead. ;) Click the recipe name to view. So I've been playing around with my dinner roll recipe and I've been able to do quite a bit with it! This next recipe turns out amazing. The hamburger buns are MOIST, not-distracting, have a GREAT TASTE and easy to make. The whole process can be done in under an hour which is such an improvement from some other hamburger bun recipes I've seen. You can also make it dairy free if you prefer. I like my hamburger buns a little dried out so you can make these the day before you have hamburgers too to save time. Great news too, these can also be FROZEN! Simply freeze them after cooling completely in an airtight ziplock bag. To thaw you can throw them in the oven at 350 for about 5-7 minutes or thaw them on the counter or in the microwave. Gluten Free Hamburger Buns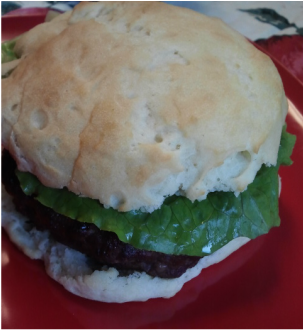 (Gluten Free, Can be Dairy Free) Created by jalene but inspired by a recipe from Carol Kicinski Makes 11-12 hamburger buns Ingredients:
Directions:
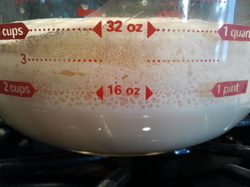 2. In a small bowl combine the yeast, sugar, and warm milk. Cover with a towel and let sit 6-8 minutes or until the yeast has doubled in size. (2 cups should become 4 cups). 3. In a mixing bowl or food processor combine rice flour, potato starch, tapioca starch, xanthan gum, salt, and baking powder. 4. Add the yeast mixture, 2 eggs, butter sub, honey and apple cider vinegar and blend while scraping sides. Mix for 3 minutes longer on medium speed. 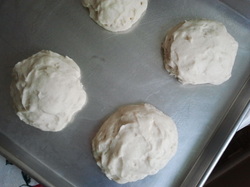 5. Scoop 1/2 cup dough out onto a cookie sheet forming a circular mound. 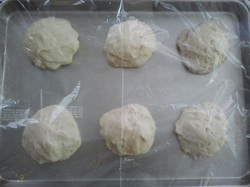 6. Spray a sheet of plastic wrap with olive oil and place on top of the rolls. Let rise 30-35 minutes. The last 10 minutes, preheat your oven to 375 F. Discard plastic wrap. 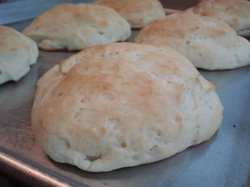 7. Bake for around 15-20 minutes or until tops are light golden brown. Slice in half and serve with your favorite burger! To store: Cool completely then keep in an airtight container. Can also frozen for later use. Trouble-shooting your BUNS:Some gluten free baking has to be done very PRECISE in order to turn out correctly. This recipe is no exception. If your buns flattened or turned out incorrectly check these helpful tips to trouble-shoot where it went wrong:
If you caught my post last week I posted a fantastic freezable gluten free and dairy free pizza crust. It makes an excellent basic pizza crust that holds together well and tastes really close to a real gluten-infested crust! But then I started thinking, "Man, wouldn't it be nice to have a gluten free crust you could cook on a pizza stone? Now that would be awesome." I had a gluten-infested recipe that I was trying to copy but the trouble with gluten free dough is that it's SO STICKY and doesn't work like a regular dough. After a bright idea I finally did it! You are going to be amazed at this crust! It raises well before cooking and develops a excellent crunch on the edges while cooking. This seriously might be your new favorite crust. I think it's actually easier than the freezable version because you can simply roll it out. (I took a lot of pictures so you could see just how easy it is.) IF YOU DON'T HAVE A PIZZA STONE, don't fret it. Just use a pizza pan that can withstand cooking at 500 degrees F. (P.S. I LOVE this pizza sauce on it. Give it a try!) Pizza Stone Italian-Style Pizza Crust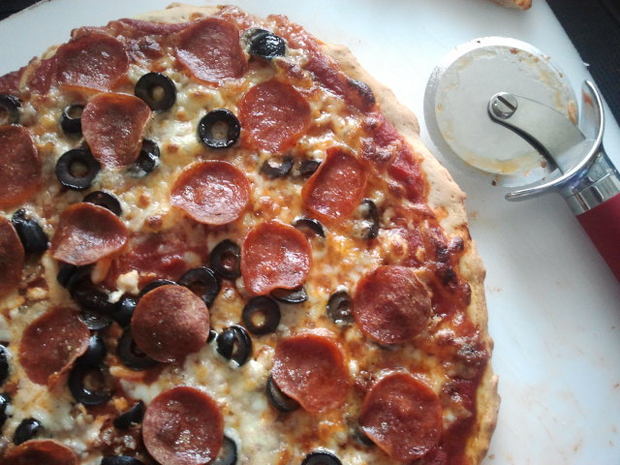 (Gluten Free, Dairy Free) Created by jalene but inspired from a recipe by the baking beauties Yields two 14-inch pizza crusts Ingredients:
Directions:
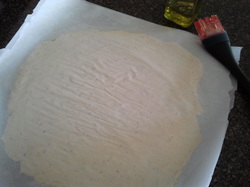 5. With a rolling pin, roll out the crust to your desired thickness. It will raise almost 1/3 of the amount. (I rolled mine to about 1/3 of an inch thick.) 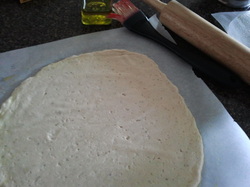 6. Remove the top layer of parchment paper and save (for prep of the 2nd crust). 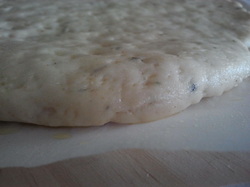 7. Place your pizza stone in the oven and preheat to 500 degrees F. Let dough rise for at least 35 minutes. Does't that crust look amazing for being gluten free?! While the first crust is rising start on your 2nd crust following the same method as above. 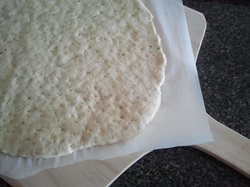 At this point I place my crust onto my pizza slider thingy (not sure what the technical name is for it...) but you don't have to have one of these. Just improvise. 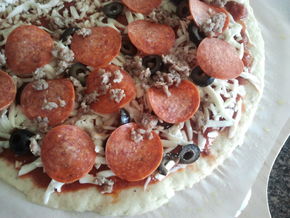 8. Top with your favorite toppings and slide into the oven onto your pizza stone. Now I know what you're thinking...parchment paper can only go to 425 degrees... So this part is really important: After 4 minutes of cooking, pull out the parchment paper from under your cooking pizza. (If you are using foil, you DON'T have to remove it. It can simply bake the entire time on it.) Bake for a total of 10-12 minutes or until cheese is melted and lightly browned. Enjoy! 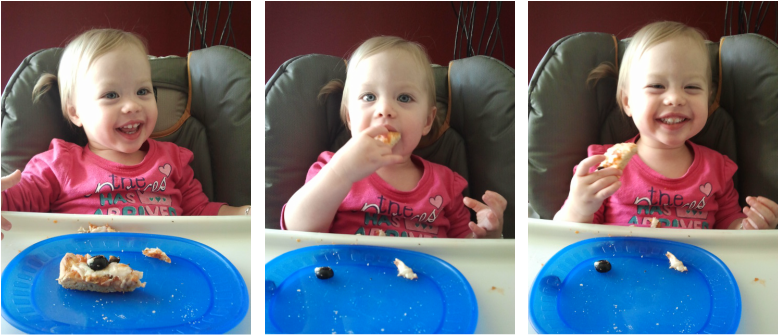 Audrey loving her gluten free, dairy free pizza! Notes from jalene:I DON'T recommend using olive oil for this recipe because the smoking point is 350 degrees. Smoking points are important to know because oils will break down and can become very harmful to your body. For the technical version read this quote: "decomposition results in the creation of hydroperoxids and then increasing levels of aldehydes. (Aldehydes are toxic compounds and recognized “markers of oxidative stress in cells” and are known contributors to “degenerative illnesses.” What does this mean for anyone who eats rancid oil? They just invited in a Trojan Horse of free radicals galore that are now beginning their violent pillaging of the person’s innards." Read more: http://www.marksdailyapple.com/oil-fat-overheat-smoking-point/#ixzz21CIl6dZ6 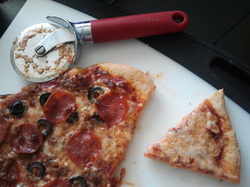 Vegan mozzerella cheese works amazing on this crust/method too. Audrey's cheese only piece is pictured to the right. I have also found the higher cooking temperature is BETTER for Vegan cheese because it was not melting like normal mozzarella does at a lower cooking temperature. One of the biggest complaints that I hear from people about being gluten free is about the BREAD. "It's like eating sawdust!" "It's SO dry, it just crumbles when you eat it." WELL NOT THIS ONE! You will be so pleasantly surprised when you try these next rolls. I took 24 of them to a family reunion for sandwiches and before you know it they were gone! I love this recipe so much I'm experimenting with it to create other variations (soon to come)! Until then, enjoy these basic dinner rolls. They're moist, hold together well, taste really similar to a regular dinner roll, and they are great for sandwiches. Soft Gluten Free Dinner Rolls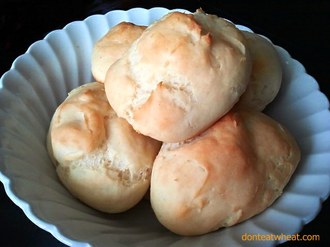 (Gluten Free, Dairy Free) Adapted by jalene from a recipe by Carol Kicinski Makes 20 rolls (using 1/4 cup per roll) For 30 rolls use a recipe and a half Ingredients:
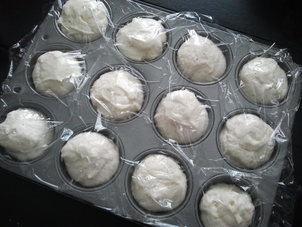 Directions:
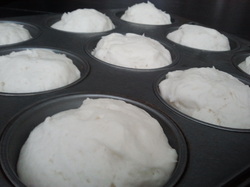 7. Remove plastic wrap. 8. Bake for around 15 minutes or until tops are light golden brown. 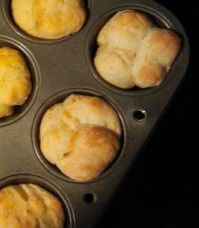 Cool slightly and remove from pan. These taste AMAZING hot out of the oven but they are also good at room temperature too. Store in an airtight container. You can even freeze them and then heat them back up when you need them. Recipe update: I now use 2 cups brown rice flour instead of both white rice flour and brown rice flour. It's a little bit healthier and it still works out great.
|
jalenewife of a holistic doctor & Recipe Categories:
All
Search our Website:

Archives
August 2020
|


 RSS Feed