|
Being Gluten Free doesn't mean you have to skip out on some of your favorite Holiday Recipes. With Christmas just around the corner, here's some links to our favorite holiday yummies! Christmas Morning...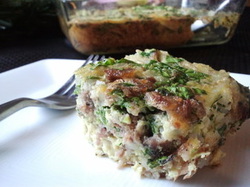 Gluten Free Breakfast Casserole
 Gluten Free Ham, Hashbrown & Egg Breakfast Cups
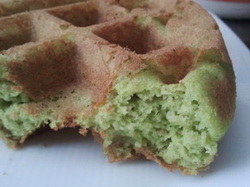 Gluten Free Green Smoothie Waffles
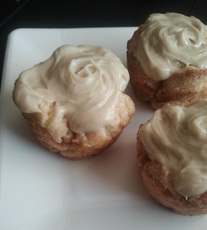 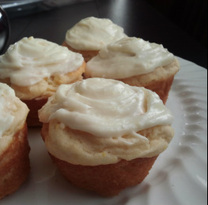
|
| | We suggest finding a good ORGANIC unsweetened Applesauce. Why? Because apples are number 1 of the top 12 dirtiest foods contaminated with pesticides and chemicals! You can learn more about the rest of the DIRTY DOZEN list on THIS website. |
One day I'll work on a ginger snap cookie in memory of her but until then you can join us on the softer side... ;)
Starchy flours such as tapioca starch or potato starch you really want to use sparingly in your baking. They turn into sugar quickly and contribute to weight gain so we usually use them sparingly at our home. I love this next recipe because I was able to make it without any of those flours! It just has one- brown rice flour. And they taste amazing! In fact, my sister-in-law said you can't even tell they're gluten free! What a compliment.
Soft Gluten-Free Ginger Cookies
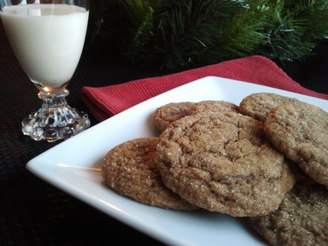
Adapted by jalene from a recipe off Allrecipes.com
Makes 18 (1 & 1/2 inch) cookies
Ingredients:
- 6 Tbsp butter (or Soy Free Earth Balance to make it Dairy Free, Earth Balance contains corn)
- 6 Tbsp sugar or evaporated cane juice sugar + additional sugar for rolling
- 1 egg
- 1/8 cup molasses
- 1 & 1/4 cup brown rice flour
- 1/2 tsp xanthan gum (or guar gum to make it Corn Free)
- 1/2 tsp baking soda
- 1 tsp ground ginger
- 1/2 tsp ground cinnamon
- 1/4 tsp ground cloves
- 1/8 tsp sea salt
Directions:
You can refrigerate the cookie dough overnight in an airtight container or you can bake it immediately. I found the brown rice softened a little more from refrigerating but they taste wonderful cooking right away as well.
- Preheat oven to 350 degrees F (if baking right away). Line a cookie sheet with parchment paper. Set aside.
- In a medium size bowl combine the brown rice flour, xanthan gum, baking soda, ginger, cinnamon, cloves, and salt. Fluff and combine with a whisk. Set aside.
- In a mixer, beat the butter and sugar until light and fluffy. Add the molasses and then the egg beating for about 30 seconds, scraping sides when necessary.
- Add all the dry ingredients in and mix until well combined.
- Using a 1 inch or 1 & 1/2 inch cookie scoop, scoop out the dough then roll in a little bit of sugar. Place on your prepared pan about 2 inches apart.
- Bake for 9-11 minutes. Do not over bake. Allow the cookies to cool on the pan for about 2-3 minutes then transfer to a wire rack to cool completely. Store in an air-tight container.
The original recipe is slightly different then this one posted. Since we know a little more about corn syrup now a days I've altered this recipe NOT to include it. For those of you that are dairy free as well, I've also included how we made it DF so Audrey could enjoy it too!
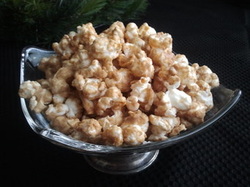
Mama Lene's Caramel Popcorn
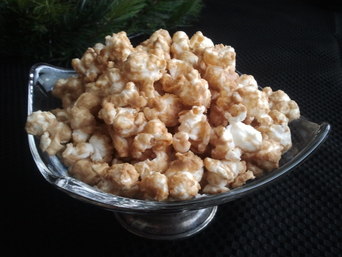
Adapted by jalene from a recipe by her mom, Alene
Ingredients:
- 1/2 cup butter (or to make dairy free use Earth Balance)
- 1/4 cup 100% pure maple syrup
- 1 cup brown sugar
- 1/4 tsp sea salt
- 1/4 tsp baking soda
- 1 tsp vanilla
- 4 quarts or 16 cups of air popped popcorn, kernels & small pieces removed
- Pop your popcorn, measure, and set aside in a large bowl.
- Preheat your oven to 250 degrees F.
- Bring to boil over medium heat the butter, syrup, sugar and salt while stirring occasionally and scraping down the sides. Continue stirring and boil for 5 minutes.
- Pull the pan off the heat and add the baking soda and vanilla. Stir well to combine and then pour the caramel over the popcorn. Toss until the popcorn is completely coated.
- Spoon the popcorn onto a parchment covered cookie sheet and bake for 1 hour, stirring every 20 minutes. Watch carefully towards the end so it doesn't get too dark.
| Corn is one of those ingredients that is IN EVERYTHING! Don't believe me? Next time study your food label. It's also known as "Corn Syrup", "High Fructose Corn Syrup", "Caramel Coloring", "Citric Acid", "Dextrose", "MSG", and many more... It's also one of the most genetically modified grains. 95% of all the corn we eat is actually GMO! To prevent further irritation to your body, look for a good organic popcorn and stick to products that only use organic corn ingredients. Remember, if it is "Organic" it HAS NOT been Genetically Modified. | For a 5 pound bag: |
I seriously cannot stop eating these! Neither can my sweet daughter...
I had to keep telling her today to stop sneaking them because I needed to snap some pictures still! These taste so incredible, I'm so pleased how they turned out! (It was my first attempt too! Hooray!)
I adapted them from a recipe by Better Home & Gardens. It used to be my go-to recipe back in college during my gluten days. All I can remember is my roommate would make these for boys she wanted to impress...Needless to say, it always got their attention! Ha ha.
Anyways, I learned some great tips while rolling out gluten free dough so be sure to check that out too.
AMAZING Gluten Free Sugar Cookies
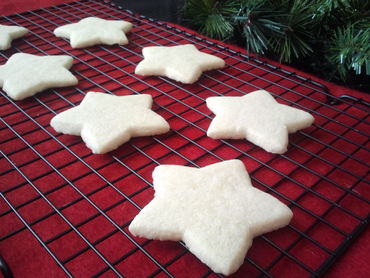
Adapted by jalene from a Better Home & Garden Recipe
Makes about 24-36 cookies, depending on how big you make them
Ingredients:
- 1 & 1/2 cups brown rice flour
- 1/2 cup potato starch
- 1/4 cup tapioca starch
- 3/4 tsp xanthan gum
- 1/4 cup + 2 Tbsp butter (or to make Dairy Free use Earth Balance)
- 1/4 cup + 1 tsp shortening (I suggest using non-hydrogenated, see note at bottom)
- 3/4 cup sugar or evaporated cane juice sugar
- 1 tsp baking powder
- 1 egg
- 1 & 1/2 tsp gluten free vanilla
- Combine the brown rice flour, potato starch, tapioca starch, and xanthan gum in a small bowl. Set aside.
- In a mixing bowl, cream together your butter (or Earth Balance) and shortening. Add the sugar and baking powder to the bowl and mix until fluffy- about a minute.
- Add the egg and vanilla. Blend well, then add the flour mixture and mix until well incorporated.
- Split the dough into 4 equal parts and wrap each section in plastic wrap. Place in the fridge to cool for about 1 hour or until the dough is harder and ready to work with.
- Preheat your oven to 375 degrees F about 15 minutes before you're ready to start rolling.
Roll out!
- Pull out 1 section of dough at a time from the fridge. After finishing with the dough, place quickly back into the fridge or even freezer if you need a quick cooling.
- Roll out the dough in between 2 pieces of plastic wrap (NOT PARCHMENT). It peels off super easy from the dough, you can see through it, and it's less expensive!
- Roll out your dough to 1/4 of inch thick. It will hold together better.
- If your dough doesn't come up with the cookie cutter, no worries. Just stick your fingers under the plastic wrap and peel the dough off.
- Place the cookies at least 1 inch apart to make sure they don't stick to each other.
- Always place cookies on a cooled cookie sheet before putting them into the oven. They will hold their shape better and cook correctly.
TO COOK: Bake for 8-10 minutes. I like my cookies before they start to turn golden so I do the 8 but when they get a little brown around the edges, they're really good too!
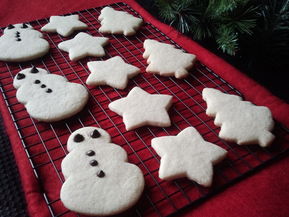
We don't use food coloring so we got creative with our decorations. See below:
Decorating with Audrey...


Of course 2 year olds have their own rules. This is Audrey's cookie. Not bad! She was eating one chocolate chip for every one she put on the cookie but at least she had some holiday fun with mom.
One of our favorite products:
| We LOVE this brand of Shortening because it's
Want to learn more about the harmful effects of hydrogenated oils? Read this excellent article from Livestrong.com. | |
If your turkey is frozen, TODAY is a good time to start thawing! Typically you should remove your turkey from the freezer and place it in the refrigerator 2-4 days BEFORE cooking. We thawed ours 4 days and there was still just a bit of ice. If you haven't thawed your turkey by Thanksgiving morning, search online for other optional thawing and cooking methods. If you are using a free range turkey that has not been frozen, you can simply skip this thawing step.
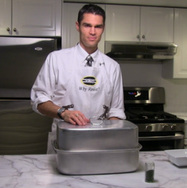
Be sure to watch the great video from my husband for some GREAT tips on how to cook your Turkey! He makes some of the best turkey I've ever tasted!
How to cook a TURKEY
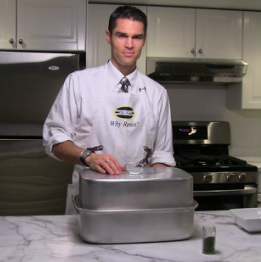
Created by Dr. Brandon Nielsen
Ingredients:
- Turkey, thawed (if frozen) 2-4 days in the fridge
- 1/2 tsp dried dill
- 1/2 tsp dried thyme
- 1/2 tsp dried oregano
- 1/2 tsp fresh ground black pepper
- 1 large or 1 & 1/2 medium onions, chopped
- 3 cloves garlic, coarsley chopped
- extra virgin olive oil
- garlic powder
- sea salt
- dried parsley
- 3 slices of orange (optional)
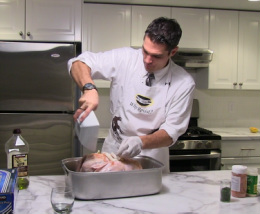
For a great step by step video tutorial on how to cook a turkey watch the link below! My husband (Dr. Nielsen) actually demonstrates all these directions and more.
- Mix together the dill, thyme, oregano, and black pepper together and set aside. Preheat the oven at 325 F.
- Pull your turkey out of the fridge (where it has been thawing for at least 2-4 days.) Cut the turkey out of the bag in a large sink. Remove the giblets and the plastic holding and discard. Remove the neck, wash completely, and set aside for later use. (We include the neck in our roasting pan which provides more juices for making gluten free gravy later. If you don't care to do this you can discard it instead.) Wash the turkey completely inside and out. Shake the excess water off.
- Place the turkey into the roaster pan BREAST SIDE UP. Holding the turkey upright, pour 2 Tbsp of olive oil into the cavity of the turkey. Throw in 1/2 of the total amount of the chopped onions and 1/2 of the total amount of garlic. Sprinkle 2 teaspoons of the sea salt and 1/2 of the total amount of herb mixture inside the cavity.
- Turn the turkey breast side up and liberally coat the breast and the legs with about 1/4 cup olive oil. Lightly sprinkle on some garlic powder, liberally sprinkle on the sea salt and parsley flakes. Turn the turkey over so the breast is down and repeat the process. Add the remaining onion, garlic, and herb mixture as well.
- Optional: you can add 3 slices of oranges to the back of the turkey. (This give it a tiny hint of sweet flavor but if you leave them off it wont change the flavor much.) Add 1-2 cups of water. Remember that the turkey is going to give off a lot of juices and so depending on the size of your turkey roaster and how much gravy you want, add water accordingly. (You don't want the juices to overflow into the oven!)
- Cover the turkey with either a lid or tin foil. [In the video Dr. Nielsen mentions to heat the turkey first at 400 F for 30 minutes- this is optional. Warning-if you forget about your turkey at this high heat you'll ruin your turkey so watch it carefully. He suggests just simply cooking the turkey at 325 the entire time.]
- Look on the back of your turkey tag and packaging to find out the weight and time to cook your particular bird. Place the turkey in the oven on the middle rack. Cook for the calculated time according to the weight/cooking time chart.
Juicy secrets from Dr. Nielsen...
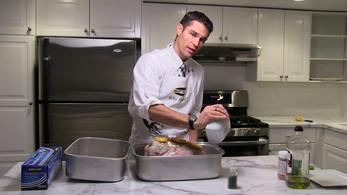
Secret #1- Cook the turkey with the breast DOWN.
Secret #2- Season not only the outside but the INSIDE of the bird as well.
Secret #3- Watch the bonus video for the third great secret.
How to Cook a Turkey
How to Cook a Turkey - Bonus
This pie can be prepared the DAY BEFORE so it wont occupy your oven. Simply cover, and refrigerate it for a fresh taste on Thanksgiving Day!
Gluten Free Pumpkin Pie
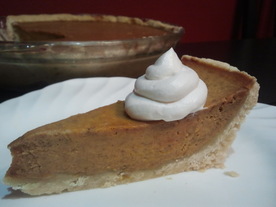
Adapted by jalene
Ingredients:
- 1/2 cup brown sugar
- 1/4 cup sugar or evaporated cane juice sugar
- 1 tsp ground cinnamon
- 1/2 tsp ground ginger
- 1/4 tsp ground nutmeg
- 1/4 tsp ground cloves
- 1/2 tsp sea salt
- 2 large eggs
- 1 tsp gluten free vanilla
- 1 can (15 oz) can pureed pumpkin
- 1 can (13.5 oz) coconut milk
Directions:
- Preheat your oven to 350 F. Roll out your GF crust or have your prepared GF crust ready.
- Combine the sugars, cinnamon, ginger, nutmeg, cloves, and salt in a small bowl.
- In a mixer, beat the eggs. Add in the sugar mixture, pumpkin, and vanilla and mix until smooth.
- On low speed, pour in your coconut milk. Scrap sides as necessary.
- Pour the filling into your unbaked crust. Bake for at least 60-75 minutes. Check by inserting a toothpick into the middle. You can also slightly shake the pan. If it is still pretty wobbly, it needs more time!
Want a GREAT dairy-free whip cream?
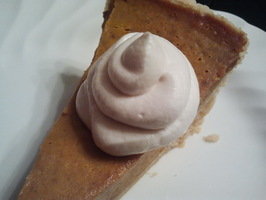
Need a Grain-Free crust?
Ingredients:
- 1 & 1/2 cups blanched almond flour
- 1/4 tsp sea salt
- 1/4 tsp baking soda
- 1/4 cup extra virgin olive oil
- 2 Tbsp honey
- 1 tsp gluten-free vanilla
Directions:
- Preheat the oven to 350 F. Combine the flour, salt and baking soda.
- In small bowl whisk together the oil, honey, and vanilla. Stir wet into dry ingredients until combined.
- Press into a 9" or deep dish pie pan.
- Bake this crust until barely set. (You're not baking it the entire way!) You must cool completely before filling (otherwise it will burn). Then fill with your pumpkin filling and bake as directed for the pumpkin pie. Watch the crust, and cover with tin foil as needed so it will not burn.
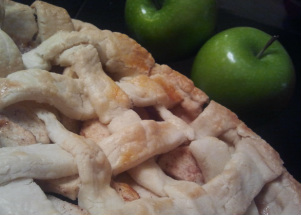
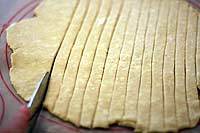
Just look at that crust! That's a gluten free lattice crust! I was super excited for it. It was a lot of fun to do. If you're not into the lattice look you can also just roll out a top crust and use a small cookie cutter to "poke" holes in it. This is a great recipe to make the day before. The crust takes at least an hour to sit in the fridge so keep that in mind in your planning.
Gluten Free Apple Pie
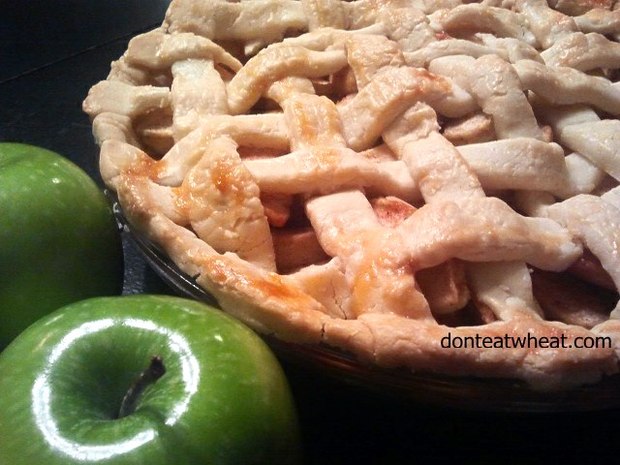
Adapted by jalene from a combination of all the many apple pie recipes out there!
Gluten Free Pie Crust Ingredients:
- 1/2 cup brown rice flour
- 1 cup sweet white rice flour
- 3/4 cup potato starch
- 3/4 cup cornstarch
- 1 & 1/2 Tbsp sugar (I used evaporated cane juice sugar)
- 3/4 tsp sea salt
- 3/4 cup butter (or to make it dairy free use Earth Balance)
- 2 eggs
- about 4-6 Tbsp of water
- 1 egg white (for painting the crust before baking)
- In a large bowl mix together all the dry ingredients: rice flours, potato starch, cornstarch, sugar, and sea salt.
- Using a pastry blender , mixer, or your fingers, cut in the butter or Earth Balance until COMPLETELY incorporated. It should resemble a fine meal. Add the eggs then add the water 1/2 Tbsp at a time (you may not need all the water so stop before the dough gets too wet.)
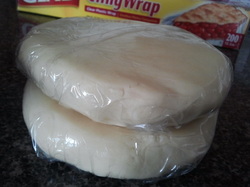
- Divide the dough in half. Wrap the dough balls separately in plastic wrap and refrigerate for at least 1 hour. After refrigerating allow to sit on the counter for 15-20 minutes before rolling out. You could prepare your filling during this time.
- 7 apples (I used 4 green and 3 red organic apples)
- 1 tsp ground cinnamon
- 1/4 tsp ground nutmeg
- 1/4 tsp sea salt
- 1/2 cup sugar (I used evaporated cane juice sugar and have tried only a 1/4 cup instead and liked it just as well)
Gluten Free Pie Filling Directions:
- Peel and core the apples. Slice each apple into 16 wedges each. Toss with the sugar, cinnamon, nutmeg, and salt.
Gluten Free Apple Pie Directions:
- Preheat your oven to 375 F.
- Unwrap 1 of your dough balls. Place it on a very large sheet of parchment paper. Tear off another piece of parchment for the top. Roll out your crust so it is about 1 & 1/2 inches larger than your pie pan. Peel off the top layer of parchment paper and turn your pie pan upside down and place it in the middle of your rolled out dough. Slide your hand under the parchment paper and put your other hand on the top of your pie pan and flip everything over so the pan is right side up and your dough is nicely placed in it. Peel off the parchment paper and gently work your dough to fit in the pan. Cut off any extra that runs over the sides.
- Roll out your second crust (also in between 2 pieces of parchment). Peel off the top layer of parchment. Cut 1 cm strips of dough.
5. Once your pie is completed, whip your egg white slightly and then paint the top of your pie with it. (This helps with the browning look.) Bake for about 50 minutes or until the crust is lightly brown.
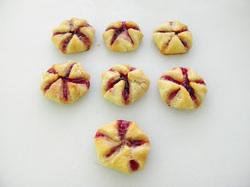
Have some leftover pie crust dough?!
jalene
wife of a holistic doctor &
mom of gluten-free, dairy-free kids
Recipe Categories:
All
Candida Cleanse Recipes
Free Class
Free Give A Way
Gluten Free Appetizers
Gluten Free Baby Food
Gluten Free Beans
Gluten Free Beef Meals
Gluten Free Breads
Gluten Free Breakfast
Gluten Free Breakfast
Gluten Free Butters
Gluten Free Cakes
Gluten Free Casseroles
Gluten Free Chicken Meals
Gluten Free Christmas
Gluten Free Condiments
Gluten Free Cookies
Gluten Free Crackers
Gluten Free Crepes
Gluten Free Crockpot
Gluten Free Croutons
Gluten Free Cupcakes
Gluten Free Curry
Gluten Free Dessert
Gluten Free Dinners
Gluten Free Dips
Gluten Free Donuts
Gluten Free Dressings
Gluten Free Dry Packets
Gluten Free Food Storage
Gluten Free Frostings
Gluten Free Ganache
Gluten Free Grain Free
Gluten Free Granola Bars
Gluten Free Granolas
Gluten Free Granolas
Gluten Free Gravy
Gluten Free Hamburger Buns
Gluten Free Ice Cream
Gluten Free Kids Meals
Gluten Free Lentil Tacos
Gluten Free Lunches
Gluten Free Milk Alternatives
Gluten Free Muffins
Gluten Free Muffins
Gluten Free Nuts
Gluten Free Paleo
Gluten Free Pancakes
Gluten Free Pasta Meals
Gluten Free Pies
Gluten Free Pizza
Gluten Free Pizza Sauces
Gluten Free Popcorn
Gluten Free Pressure Cooker Meals
Gluten Free Pudding
Gluten Free Pumpkin Recipes
Gluten Free Raw Foods
Gluten Free Rice
Gluten Free Rolls
Gluten Free Salads
Gluten Free Sauces
Gluten Free Sides
Gluten Free Smoothies
Gluten Free Snacks
Gluten Free Soups
Gluten Free Stir Frys
Gluten Free Sugar Free
Gluten Free Thanksgiving
Gluten Free Turkey Meals
Gluten Free Vacations
Gluten Free Vegan
Gluten Free Veggies
Gluten Free Waffles
Gluten Free Zucchini Recipes
Only 1 Kind Flour Recipes
Only-1-kind-flour-recipes
Other
Search our Website:


Archives
August 2020
June 2019
May 2019
April 2019
November 2015
July 2015
February 2015
January 2015
December 2014
November 2014
October 2014
September 2014
August 2014
July 2014
June 2014
May 2014
April 2014
March 2014
February 2014
January 2014
December 2013
November 2013
October 2013
September 2013
August 2013
July 2013
June 2013
May 2013
April 2013
March 2013
February 2013
January 2013
December 2012
November 2012
October 2012
September 2012
August 2012
July 2012
June 2012
May 2012
April 2012


 RSS Feed